
The Ultimate Examination Roblox Walkthrough: Mastering the Itagura NPP Facility
Struggling with the Itagura NPP? Our comprehensive Examination Roblox walkthrough provides tips for navigation, keycard locations, and survival strategies.
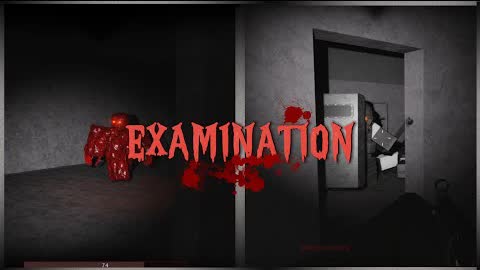 Gameplay videoStruggling with the Itagura NPP? Our comprehensive Examination Roblox walkthrough provides tips for navigation, keycard locations, and survival strategies.YouTube
 Navigating the Itagura Nuclear Power Plant
If you have been searching for a reliable Examination Roblox walkthrough to help you survive the horrors of the Itagura NPP, you have come to the right place. This atmospheric horror game demands precision and nerves of steel, making a solid Examination Roblox walkthrough essential for any player hoping to reach the final sectors without succumbing to the facility's many dangers. Whether you are a newcomer or a seasoned veteran looking to optimize your run, understanding the layout is your first step toward success.
The Itagura NPP is not just a map; it is a complex, multi-tiered environment where every decision counts. From the initial lobby to the deadly depths of the basement, knowing where to go and what to avoid is the difference between a successful mission and a quick demise.
Understanding Facility Layout and Safety Zones
The facility is divided into distinct sectors, each presenting its own unique environmental challenges. Safety is a luxury in this game, and knowing which areas are off-limits to hostiles can save your life during a tense chase.
Key Facility Areas Overview
| Sector | Primary Objective | Safety Status |
|---|---|---|
| Lobby | Initial Staging | Safe (Hostiles blocked) |
| Sector 1 | Activate Pump #1 | Mixed (Decontamination safe) |
| Basement | Reactor Valve & Power | High Danger |
| Sector 2 | Logistics & Keycard | High Danger |
| Sector 3 | Final Clearance | Unknown/Extreme |
According to community reports, the lobby and the area before the decontamination showers in Sector 1 are your best bets for catching your breath. Hostiles, including the formidable Chimera, are unable to path through these specific zones, making them perfect for tactical regrouping.
Step-by-Step Progression Guide
To progress through the game, you must follow a specific sequence of actions. Skipping steps or missing environmental cues will leave you stuck in the early sectors.
Sector 1 and The Basement
- The Lobby: Start your journey here. Familiarize yourself with the locker room to prepare your gear.
- Generator Pump #1: Head to Sector 1. You must locate and activate the first generator pump. This action triggers the door to the basement.
- The Basement: Once the beeping sound initiates, enter the basement. You will need to locate the backup generator to maintain progress.
- The Elephant’s Foot: Exercise extreme caution. You will encounter a hazmat operative near a radiation warning. Do not—under any circumstances—look at the Elephant’s Foot, as it results in an immediate game over.
Essential Survival Mechanics
| Mechanic | Action Required | Consequence of Failure |
|---|---|---|
| Generator Pump #1 | Manual Activation | Cannot access basement |
| Basement Valve | Rotate for access | Cannot enter Sector 2 |
| Elephant's Foot | Look away/Avoid gaze | Instant Death |
| Blue Keycard | Collect from Gate-1 | Cannot access Gate Control |
Unlocking Sector 2: Logistics and Strategy
Sector 2 introduces more complex puzzles involving keycards and control room operations. Players often find themselves stuck here due to the non-linear nature of the room layouts.
To gain access to the restricted sub-sectors, you must head to the Sector 2 Control Room. Follow these steps:
- Navigate to the furthest room on the left.
- Interact with the laptop located on the floor to initiate the control sequence.
- Use the "emergency door shutters" button to clear your path.
Once you have opened the necessary shutters, your next priority is the Sector-2 Logistics area. You will need to obtain a blue keycard from the Gate-1 area. After securing the card, backtrack to the staircase leading to the card reader door. Inside this room, you will find another critical laptop; interacting with this is the final step to opening the path to Sector 3.
Pro-Tips for Advanced Gameplay
Many players overlook the importance of the Armory in Sector 2. While the game focuses heavily on environmental navigation, having the P95 and extra ammunition can be the deciding factor when you are cornered by infected hostiles.
Community-Sourced Combat Strategies
- Ammo Conservation: Only engage when absolutely necessary. The game is designed to emphasize survival over combat.
- Pathing Exploits: Utilize the decontamination showers in Sector 1 to reset enemy aggro if you are being pursued by multiple hostiles.
- Audio Cues: Listen for the specific audio warnings that trigger after activating generators. These often signal that the facility's security systems have shifted.
For further information on the game's lore and technical updates, check the official Examination Wiki for the latest community-verified data.
Frequently Asked Questions
What is the most dangerous part of the map?
The basement is widely considered the most dangerous area due to the lethal "Elephant's Foot" hazard. If you look at it directly, you will die instantly, so keep your camera pointed away when passing through that chamber.
How do I get into Sector 3?
To reach Sector 3, you must fully complete the objectives in Sector 2, including collecting the blue keycard from Gate-1 and using it to access the room with the final laptop that triggers the sector gate.
Where can I find more help with an Examination Roblox walkthrough?
You can find additional tips and community-driven strategies by joining the game's official Discord server or checking the Fandom wiki, where players regularly share map updates and survival tactics.
Are there any safe zones for players?
Yes, the initial Lobby and the area before the decontamination showers in Sector 1 are currently safe zones where hostiles cannot enter. Use these spots to manage your inventory and prepare for the next leg of your journey.
Related Guides
Examination Roblox All Badges: A Comprehensive Guide to Unlocking Every Achievement
Looking for a complete list of Examination Roblox all badges? Discover which achievements you can earn right now and which ones remain hidden.
Examination Roblox Tips: The Ultimate Survival Guide for the WE-30 Outbreak
Master the irradiated halls of Menlo with our Examination Roblox tips. Learn boss strategies, class builds, and survival tactics for the WE-30 outbreak.
Examination Roblox: How to Get Underequipped Achievement and Survival Tips
Master the Examination Roblox how to get underequipped challenge with our comprehensive guide to sectors, gear management, and rare badge hunting.
Examination Roblox: How to Play This Intense PvE Horror Shooter Guide
Master the irradiated halls of Menlo in Examination on Roblox. Learn how to play, manage your gear, and survive the WE-30 outbreak with our expert guide.